How To Bleach A Shirt Design: The Ultimate Guide For Creative DIY Projects
Transforming a plain shirt into a masterpiece has never been easier with the right techniques. If you're wondering how to bleach a shirt design, this comprehensive guide will walk you through every step of the process. Whether you're a beginner or an experienced crafter, mastering the art of bleaching shirts can open up endless creative possibilities.
Creating unique designs on shirts is more than just a hobby; it’s a way to express your individuality. Bleaching shirts offers a hands-on approach to designing clothes that reflect your personal style. In this article, we’ll explore how to bleach a shirt design effectively, ensuring you achieve professional-looking results without the need for expensive equipment.
From understanding the basics of fabric bleaching to advanced techniques, we’ve got you covered. By the end of this guide, you’ll have the confidence and knowledge to create stunning shirt designs that stand out. Let’s dive in!
Table of Contents
- Introduction to Bleach Shirt Design
- Essential Tools and Materials
- Preparing Your Shirt for Bleaching
- Bleach Techniques to Try
- Safety Precautions When Bleaching
- Creating Your Own Bleach Designs
- Troubleshooting Common Issues
- Best Fabrics for Bleach Designs
- Expert Tips for Stunning Results
- Conclusion and Next Steps
Introduction to Bleach Shirt Design
What is Bleach Shirt Design?
How to bleach a shirt design involves using bleach to create patterns, textures, and designs on fabric. This technique is popular among DIY enthusiasts because it allows for endless customization. Bleach reacts with the dye in fabrics, removing color and leaving behind white or lighter patterns. The result is a unique, one-of-a-kind piece of clothing that reflects your creativity.
Bleach shirt design is not only affordable but also eco-friendly, as it gives new life to old garments. Whether you're updating your wardrobe or creating gifts for friends, this method is both practical and stylish.
Essential Tools and Materials
What You’ll Need to Get Started
Before diving into the process of how to bleach a shirt design, gather the necessary tools and materials. Here’s a list to help you prepare:
- Noodle Dynasty Berkeley
- Playground And Restaurant
- Hotel Carlton On The Grand Canal
- Paperboy Apparel
- Black Kettle Tea
- Household bleach (ensure it's suitable for fabric)
- A plain cotton shirt (pre-washed for best results)
- Gloves to protect your hands
- A spray bottle or paintbrush for application
- Plastic wrap or cardboard to protect non-targeted areas
- Vinegar for neutralizing bleach after use
- A workspace that can handle spills and stains
Having these items ready will ensure a smooth and successful bleaching session.
Preparing Your Shirt for Bleaching
Choosing the Right Shirt
When learning how to bleach a shirt design, the fabric you choose matters. Cotton shirts work best because they absorb bleach evenly. Polyester or synthetic blends may not react as well, leading to inconsistent results. Always pre-wash your shirt to remove any finishes or oils that could interfere with the bleaching process.
Once your shirt is ready, lay it flat on a protected surface. Use cardboard or plastic between layers to prevent bleach from seeping through and affecting the back of the shirt.
Bleach Techniques to Try
Popular Bleach Shirt Designs
There are several techniques you can use when bleaching shirts. Here are a few popular methods:
- Splatter Technique: Use a spray bottle to create a speckled effect.
- Tie-Dye Bleach: Fold and tie your shirt with rubber bands before applying bleach for a vibrant pattern.
- Stenciling: Place stencils on the shirt and apply bleach to create precise designs.
- Brush Painting: Use a paintbrush to draw or paint designs directly onto the fabric.
Experimenting with these techniques can lead to exciting and unexpected results. Don’t be afraid to mix and match methods for a truly unique look.
Safety Precautions When Bleaching
Staying Safe While Bleaching
Safety is paramount when working with bleach. Follow these guidelines to protect yourself and your workspace:
- Wear gloves to avoid skin irritation.
- Work in a well-ventilated area to prevent inhaling fumes.
- Keep bleach away from children and pets.
- Avoid mixing bleach with other chemicals, as this can produce harmful gases.
After bleaching, rinse your shirt thoroughly and soak it in a vinegar solution to neutralize any remaining bleach. This step ensures the fabric is safe to wear.
Creating Your Own Bleach Designs
Let Your Imagination Run Wild
Once you’ve mastered the basics of how to bleach a shirt design, it’s time to get creative. Consider incorporating personal touches, such as hand-drawn sketches or meaningful symbols. You can also use bleach to create ombre effects or mimic vintage washes.
For inspiration, look to fashion trends, nature, or even abstract art. The possibilities are limitless when it comes to designing with bleach. Remember, practice makes perfect, so don’t be discouraged if your first attempts aren’t flawless.
Troubleshooting Common Issues
Overcoming Challenges in Bleach Shirt Design
Even experienced DIYers encounter issues when bleaching shirts. Here are some common problems and solutions:
- Uneven Bleaching: Ensure the bleach is applied consistently and the fabric is evenly saturated.
- Color Bleeding: Use color-safe bleach or test on a small area first.
- Design Fading: Allow the bleach to sit for the recommended time before rinsing.
If you run into difficulties, refer to the troubleshooting section for guidance. With a little patience, you can achieve the desired results.
Best Fabrics for Bleach Designs
Fabrics That Work Best with Bleach
Not all fabrics respond well to bleach. Natural fibers like cotton and linen are ideal for bleaching, as they absorb the chemical evenly. Synthetic fabrics, such as polyester, may not react as predictably, resulting in uneven patterns.
For optimal results, choose 100% cotton shirts. If you’re working with blends, test a small area first to gauge the outcome. Understanding fabric properties will help you select the right material for your project.
Expert Tips for Stunning Results
Advanced Techniques for Better Outcomes
To elevate your bleached shirt designs, consider these expert tips:
- Use a bleach activator to enhance the bleaching process.
- Experiment with different concentrations of bleach for varied effects.
- Layer designs by applying bleach in stages.
- Combine bleaching with other fabric techniques, such as dyeing or printing.
These strategies can take your creations to the next level, making them stand out in any wardrobe.
Conclusion and Next Steps
In conclusion, learning how to bleach a shirt design opens up a world of creative possibilities. By following the steps outlined in this guide, you can achieve professional-quality results with minimal effort. Remember to prioritize safety, choose the right materials, and let your imagination guide you.
Now that you’ve mastered the basics, why not share your creations with others? Leave a comment below with your favorite bleaching technique or show off your designs on social media. For more DIY inspiration, explore our other articles on fashion and crafting. Happy designing!
Data Source: Environmental Protection Agency for safety guidelines and Fashion Institute of Design & Merchandising for fabric information.
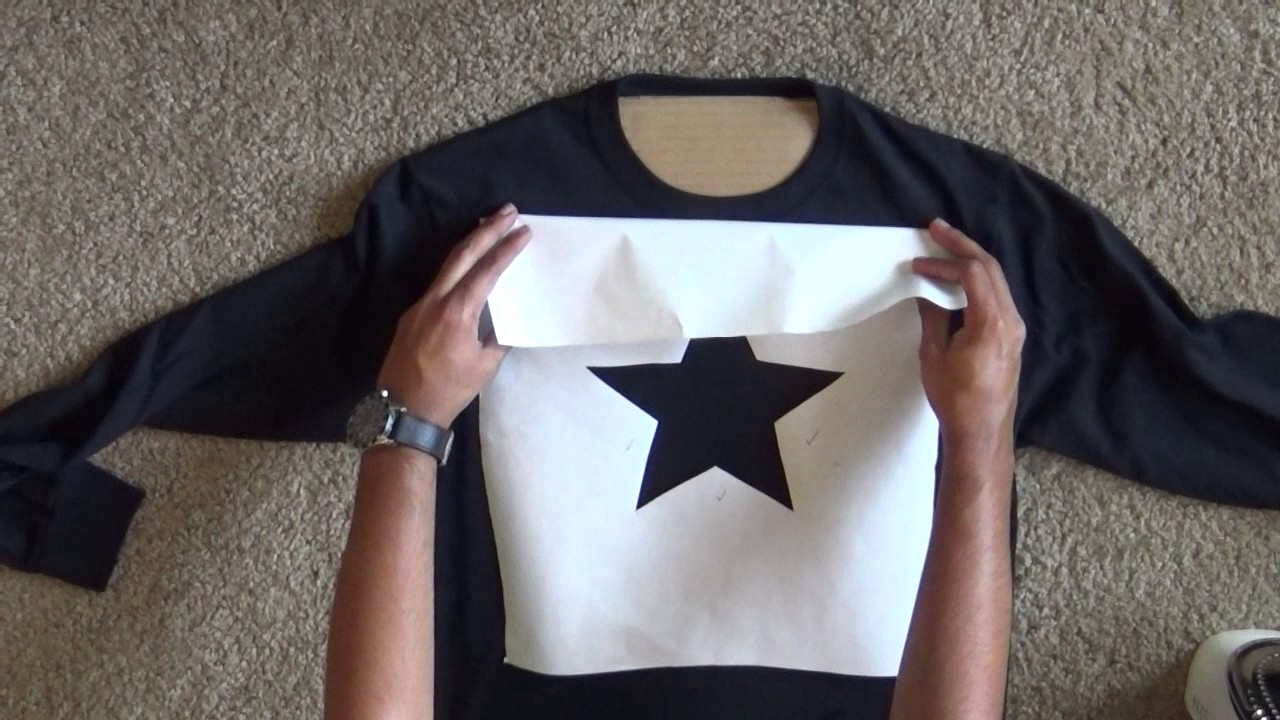
How to bleach a design onto a tshirt YouTube
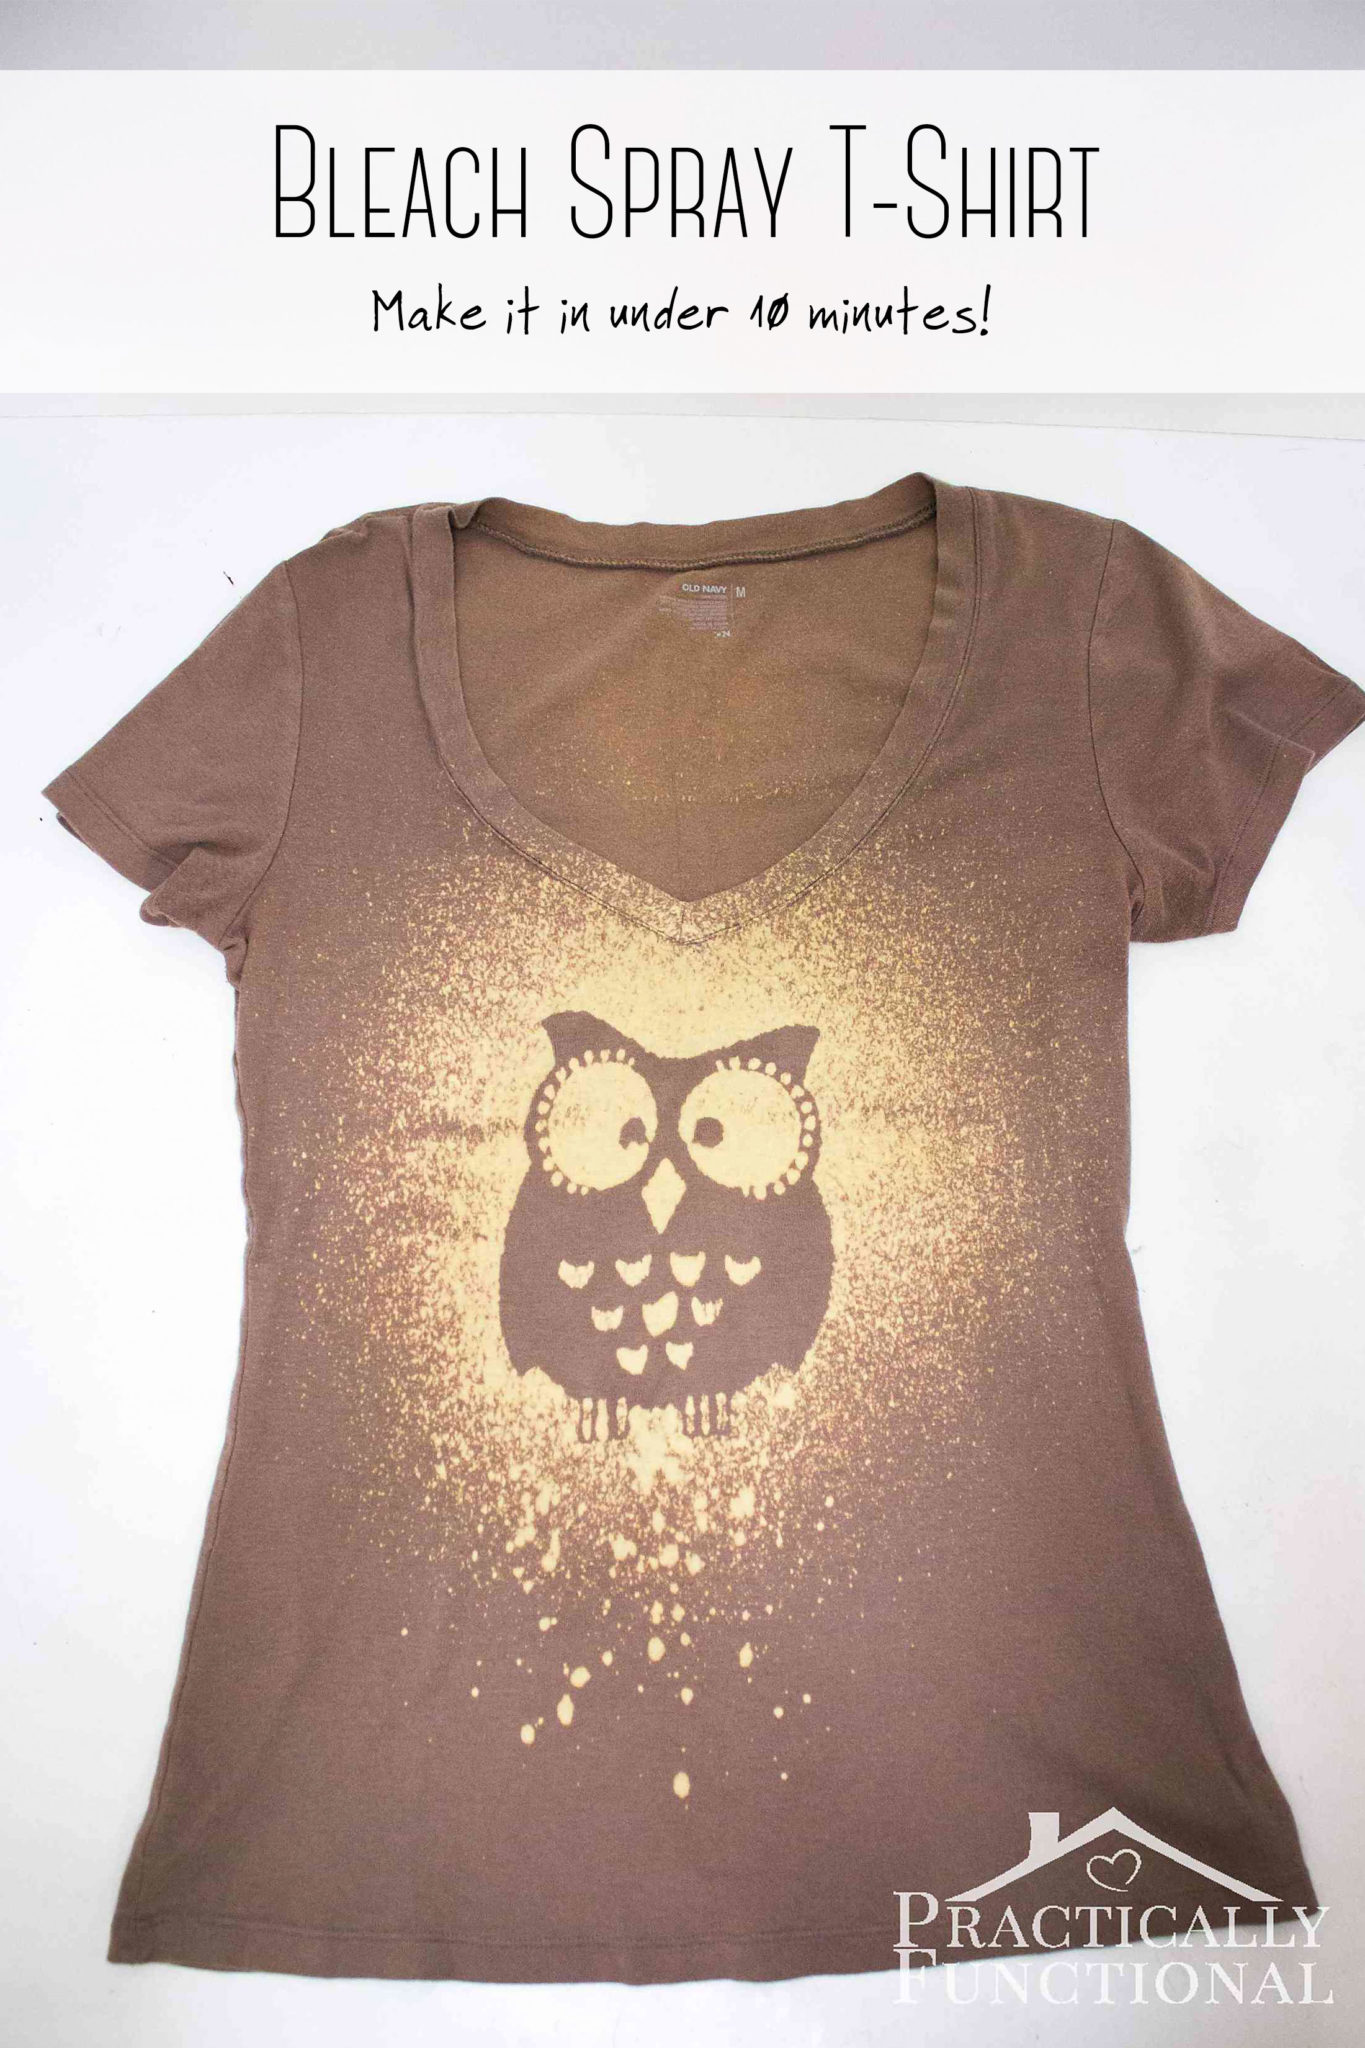
Make Your Own Bleach Spray Shirt In Just 10 Minutes! Practically
