How To Repair Scratched Black Rims: A Comprehensive Guide
Scratched black rims can be an eyesore, but they don't have to remain that way. Whether your rims have minor scratches or deep gouges, restoring them is easier than you might think. This guide will walk you through the process of repairing scratched black rims, ensuring your vehicle looks as good as new.
Driving with damaged rims not only affects the aesthetics of your car but can also compromise its performance. While replacing rims can be expensive, learning how to repair scratched black rims can save you money and give you a sense of accomplishment. This article aims to provide you with all the tools, techniques, and tips you need to restore your rims effectively.
From understanding the materials required to mastering the techniques, we'll cover everything step by step. By the end of this guide, you'll be equipped with the knowledge to tackle even the most challenging rim repairs. Let's dive in!
Table of Contents
- Introduction
- Tools and Materials Needed
- Cleaning the Rims
- Assessing the Damage
- Repairing Surface Scratches
- Repairing Deep Scratches
- Painting the Rims
- Polishing the Rims
- Sealing the Rims
- Maintenance Tips
- Conclusion
Tools and Materials Needed
Before you begin repairing your scratched black rims, it's essential to gather the right tools and materials. Having everything ready will make the process smoother and more efficient. Below is a list of items you'll need:
Tools
- Sandpaper (various grits: 400, 800, 1500)
- Dremel tool or rotary sander
- Plastic putty knife
- Paintbrushes (small and medium)
- Masking tape
- Protective gloves
- Goggles
Materials
- Black rim paint (compatible with your rim's material)
- Clear coat sealant
- Rim cleaner
- Polishing compound
- Microfiber cloths
Ensure that the materials you choose are suitable for your rim's specific material, whether it's aluminum, steel, or another type. This will guarantee the best results.
Cleaning the Rims
Cleaning your rims is the first step in the repair process. A clean surface ensures that the paint adheres properly and that any repair work is done effectively.
- Parkview Classroom Building
- Simply Delicious Bakery Cocoa Beach
- North Italia Ballantyne
- Julio Camejo Actor
- Paper Moon Clothes
Start by washing the rims with a high-quality rim cleaner. Use a brush or sponge to scrub away dirt, brake dust, and grime. Rinse thoroughly with water and dry the rims with a microfiber cloth. This step is crucial as any leftover debris can interfere with the repair process.
Assessing the Damage
Once your rims are clean, it's time to assess the damage. Understanding the extent of the scratches will help you determine the best course of action.
Types of Scratches
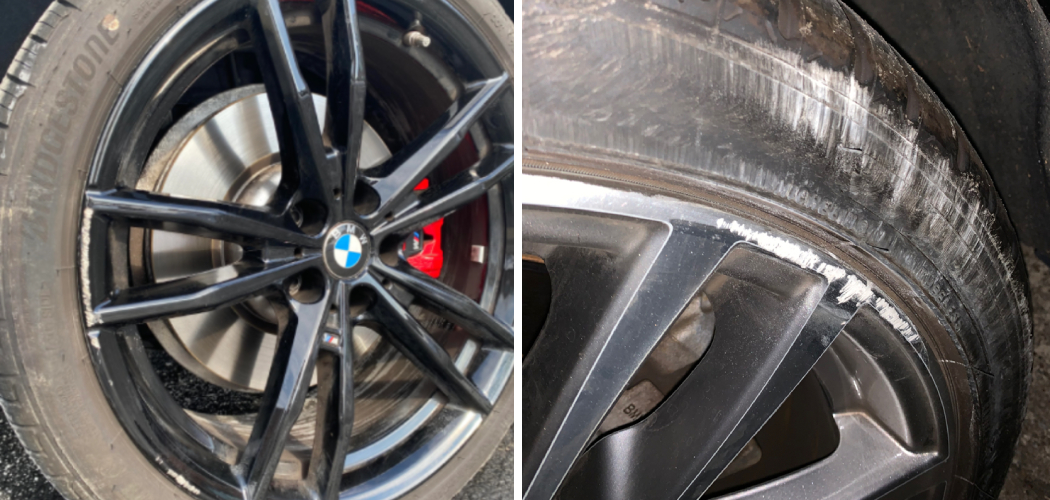
- Surface Scratches: These are minor scratches that only affect the top layer of the paint.
- Deep Scratches: These scratches penetrate through the paint and reach the metal underneath.
For surface scratches, a simple polishing may suffice. However, deep scratches require more extensive repair, including filling and repainting.
Repairing Surface Scratches
Surface scratches are the easiest to repair and can often be resolved with a few simple steps.
Begin by using a fine-grit sandpaper (1500 grit) to gently sand the scratched area. This will help smooth out the surface. After sanding, apply a polishing compound to the area using a microfiber cloth. Buff the area until the scratch is no longer visible. Finish by applying a clear coat sealant to protect the repaired area.
Repairing Deep Scratches
Deep scratches require a more involved process. Here's how to repair them:
Steps to Repair Deep Scratches
- Use a Dremel tool or rotary sander with a coarse-grit sandpaper (400 grit) to remove any loose paint around the scratch.
- Switch to a finer-grit sandpaper (800 grit) to smooth the area further.
- Apply a small amount of automotive filler to the scratch using a plastic putty knife. Allow it to dry according to the manufacturer's instructions.
- Sand the filled area with 1500-grit sandpaper until it's flush with the surrounding surface.
Once the area is smooth, you can proceed to the painting stage.
Painting the Rims
Painting your rims is a critical step in the repair process. It ensures that the repaired area blends seamlessly with the rest of the rim.
Start by applying masking tape to any areas you don't want to paint. Use a small paintbrush to apply the black rim paint to the repaired area. Apply thin, even coats, allowing each coat to dry before applying the next. Typically, three coats are sufficient for a durable finish.
Polishing the Rims
Polishing your rims will enhance their appearance and give them a professional finish.
Using a polishing compound and a microfiber cloth, buff the entire rim surface. This will remove any remaining imperfections and leave the rims looking shiny and new. Pay special attention to the repaired areas to ensure they match the rest of the rim.
Sealing the Rims
Sealing your rims is the final step in the repair process. A clear coat sealant will protect the paint from future damage and prolong the lifespan of your rims.
Apply the clear coat sealant in thin, even layers, allowing each layer to dry before applying the next. Typically, two to three coats are recommended. Once the sealant is dry, your rims will be ready for the road.
Maintenance Tips
Proper maintenance is key to keeping your rims in excellent condition. Here are some tips to help you maintain your newly repaired rims:
- Regularly clean your rims to prevent dirt and brake dust buildup.
- Avoid driving over curbs or obstacles that could damage your rims.
- Inspect your rims periodically for any new scratches or damage.
- Apply a protective wax or sealant every few months to maintain their shine.
By following these tips, you can ensure that your rims remain in top condition for years to come.
Conclusion
Repairing scratched black rims is a rewarding task that can significantly improve the appearance of your vehicle. By following the steps outlined in this guide, you can restore your rims to their original condition and save money in the process.
Remember to use the right tools and materials, assess the damage thoroughly, and take your time with each step. Proper maintenance will also help you avoid future repairs.
We encourage you to share your experience with repairing scratched black rims in the comments below. If you found this guide helpful, please consider sharing it with others who might benefit from it. For more tips and tricks on car maintenance, explore our other articles on the site.
How to Fix Scratched Matte Black Rims 10 Easy Steps (2025)

How To Fix Black Rim Scratches
