How To Remove Industrial Piercing Safely And Effectively
Removing an industrial piercing may seem like a simple task, but it requires careful attention to detail and proper technique to avoid complications or infections. Whether you're considering taking out your industrial piercing for personal reasons, style changes, or health concerns, understanding the correct steps is essential. This guide will walk you through everything you need to know about how to remove industrial piercing safely and effectively.
Industrial piercings have become increasingly popular due to their edgy and stylish appearance. However, there may come a time when you decide to remove your industrial piercing. It's crucial to approach this process with caution to ensure your safety and prevent potential issues.
In this comprehensive article, we will explore the step-by-step process of removing an industrial piercing, discuss potential risks, and provide expert tips to help you make informed decisions. Whether you're doing it at home or consulting a professional, this guide will equip you with the knowledge you need.
Understanding Industrial Piercing
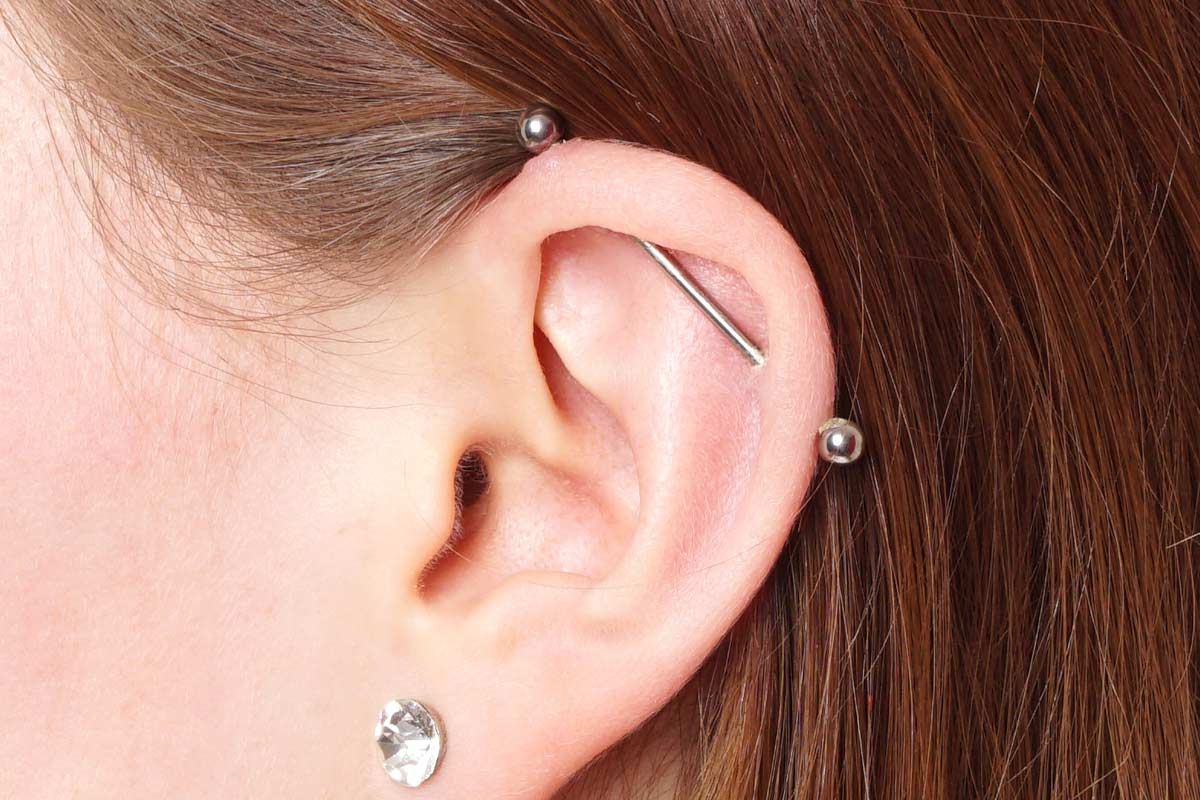
Before diving into the process of how to remove industrial piercing, it's important to understand what an industrial piercing is. An industrial piercing is a type of body modification that involves two piercing holes connected by a single barbell. Typically, this piercing is done on the ear and spans from one part of the ear to another, creating a striking visual effect.
Types of Industrial Piercings
There are several variations of industrial piercings, each with its unique characteristics:
- Standard Industrial Piercing: The most common type, connecting two holes with a single barbell.
- Vertical Industrial Piercing: This type runs vertically, usually from the top of the ear to the lobe.
- Double Industrial Piercing: Involves two separate barbells instead of one, creating a more complex design.
When Should You Consider Removing Your Industrial Piercing?
There are various reasons why someone might want to remove their industrial piercing. Understanding these reasons can help you make an informed decision:
Health Concerns
One of the primary reasons for removing an industrial piercing is health-related issues. Infections, allergic reactions, or chronic irritation can make it necessary to take out the jewelry. If you experience symptoms such as redness, swelling, or discharge, consult a professional before attempting to remove the piercing yourself.
Style Changes
Fashion trends evolve, and what once seemed appealing may no longer align with your current style. Removing an industrial piercing can be a way to explore new looks or experiment with different types of jewelry.
Personal Reasons
Some individuals choose to remove their industrial piercing due to personal preferences, cultural beliefs, or professional requirements. Whatever the reason, it's essential to prioritize your comfort and well-being.
Preparing for the Removal Process
Before you begin the removal process, proper preparation is key to ensuring a smooth and safe experience. Follow these steps to get ready:
Gather the Necessary Tools
Ensure you have all the tools you need before starting:
- Sterile gloves
- Clean hands
- A clean, soft cloth
- Antiseptic solution
- A new set of jewelry (if you plan to replace it)
Clean the Area
Thoroughly clean the area around the piercing using an antiseptic solution. This reduces the risk of infection and ensures a hygienic environment for the removal process.
Step-by-Step Guide: How to Remove Industrial Piercing
Now that you're prepared, here's a detailed guide on how to remove industrial piercing:
Step 1: Wash Your Hands
Start by washing your hands with soap and water. This prevents the transfer of bacteria to the piercing site.
Step 2: Put on Sterile Gloves
Wear sterile gloves to maintain a clean and hygienic environment during the removal process.
Step 3: Clean the Piercing
Use an antiseptic solution to clean the piercing and the surrounding area. Gently wipe the area with a clean cloth to remove any dirt or debris.
Step 4: Remove the Jewelry
Carefully unscrew the ball or bead at one end of the barbell. Hold the jewelry steady with one hand while gently pulling it out with the other. Avoid forcing the jewelry if it feels stuck; consult a professional if necessary.
Step 5: Inspect the Piercing
Once the jewelry is removed, inspect the piercing site for any signs of infection or irritation. If everything looks normal, proceed to the next step.
Step 6: Clean the Area Again
After removing the jewelry, clean the piercing site once more to ensure it remains free of bacteria.
Potential Risks and Complications
While removing an industrial piercing is generally safe, there are potential risks to be aware of:
Infections
Improper removal techniques can lead to infections. Signs of infection include redness, swelling, pain, and discharge. If you notice any of these symptoms, seek medical attention immediately.
Scarring
Some individuals may experience scarring after removing their industrial piercing. To minimize scarring, keep the area clean and avoid touching it unnecessarily.
Allergic Reactions
If you're allergic to certain metals, ensure the jewelry you use is made from hypoallergenic materials. This reduces the risk of allergic reactions during and after the removal process.
Tips for a Smooth Removal Process
Follow these expert tips to ensure a smooth and safe removal experience:
- Consult a professional piercer if you're unsure about the process.
- Use high-quality, sterile jewelry to replace the industrial piercing if desired.
- Avoid touching the piercing site with unwashed hands.
- Keep the area clean and dry to promote healing.
Healing After Removal
After removing your industrial piercing, proper care is essential to ensure proper healing:
Monitor the Area
Keep an eye on the piercing site for any signs of infection or irritation. If you notice any unusual symptoms, consult a healthcare professional.
Apply Antiseptic
Regularly apply an antiseptic solution to the area to prevent infection and promote healing.
Protect the Area
Avoid exposing the piercing site to harsh chemicals or environments that could cause irritation. Use protective coverings if necessary.
Conclusion
Removing an industrial piercing requires careful planning and execution to ensure your safety and minimize potential risks. By following the steps outlined in this guide, you can safely and effectively remove your piercing while maintaining proper hygiene and care. Remember to consult a professional if you're unsure about any part of the process.
We encourage you to share your thoughts and experiences in the comments below. If you found this article helpful, don't forget to share it with your friends and family. For more informative content on body modifications and health, explore our other articles on the website.
Table of Contents
- Understanding Industrial Piercing
- Types of Industrial Piercings
- When Should You Consider Removing Your Industrial Piercing?
- Health Concerns
- Style Changes
- Personal Reasons
- Preparing for the Removal Process
- Gather the Necessary Tools
- Clean the Area
- Step-by-Step Guide: How to Remove Industrial Piercing
- Potential Risks and Complications
- Tips for a Smooth Removal Process
- Healing After Removal
- Conclusion

Removing My Industrial Piercing YouTube
Industrial Piercings Infected
